a
How To Increase Wordpress Blog Upload Size
In this article, I will show you how to easily increase the maximum file upload size in WordPress to be able to upload large media files to your WP Blog/Website.
Before We Start
WordPress will automatically show the maximum file upload size limit when you are uploading images or media, so if you want to know what your site’s upload limit is, you can visit Media -> Add New as shown in the image bellow.
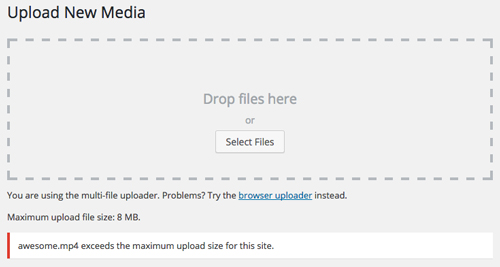
Bellow the upload box it will be prompt the following message “Maximum upload file size” with a number next to it, in megabytes. This is the maximum your uploaded files can be. By default, this number ranges anywhere from 2MB to 128MB and dictates how big an uploaded file can be. If you find yourself on the smaller end of that scale, you may want to increase your upload limit to accommodate larger media files.
Finding Your Settings
Before we being trying the method to solve this issue there are particular specs we must be aware of. This specs are related with how your site PHP is configured. Fortunately, PHP provides us with the function phpinfo() that we can use to get information about it’s configuration.
To do this first search in your web server root directory for any file named info.php , it’s most probably that you won’t find it so you will need to create the file with the following PHP code:
<?php phpinfo() ?>
With the file created upload it to your web server and go to “yourwebsite.com/info.php”. This will present you with a list of details about your PHP configuration like the following image example.
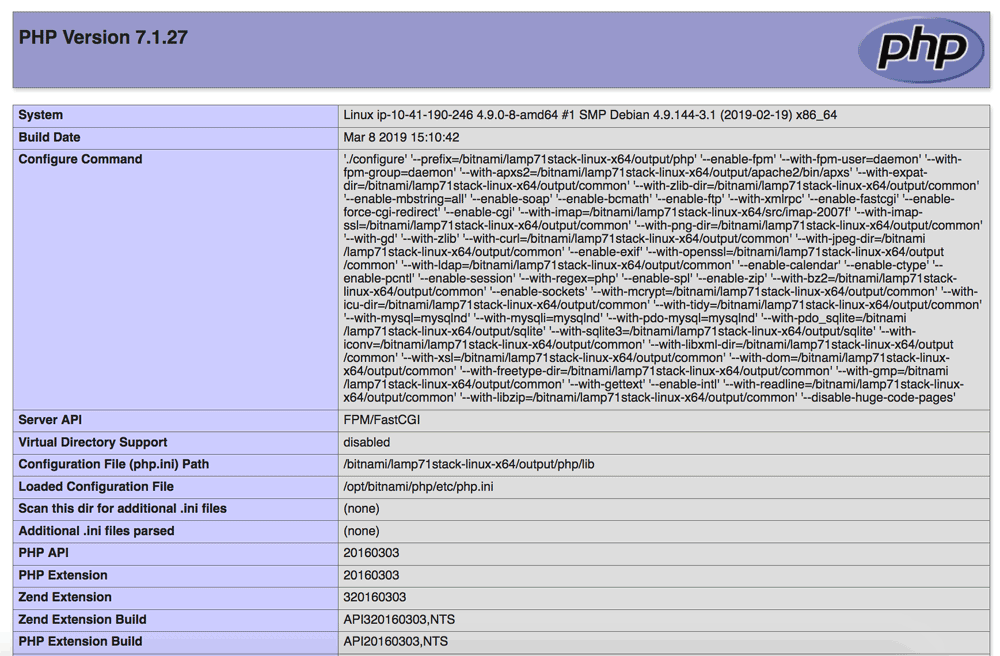
In the list of details you will find three settings within that are relevant to your upload limit:
-
memory_limit – This defines how much memory is allocated to PHP. You will simply need to ensure that this number is as high or higher than the upload limit you want to set.
-
post_max_size – This defines the maximum size that is handled in a POST request. We will need to set this to our new upload limit.
-
upload_max_filesize – This defines the maximum size for file uploads. This will also be set to our new upload limit.
By searching through the file you’ll be able to see how these settings of PHP configuration. Now that we have identified the settings that we want to alter, there are several methods to change them but in this article I will be presenting one that will produce less bugs and is straight to the point.
How To Solve (The Quick Way)
Ps:Before you start making changes to your server’s configuration, you should make a backup of your site and database. If you find your php.ini file(resources about), you will also want to back this file up locally.
This method works by changing or creating the php.ini of your server. This file is usually located in the root directory of your website. So, first you will need to check if there’s any php.ini file in the root directory or in the folder wp-admin.
Let’s suppose there isn’t, so we will need to create the it. To do this, open any text editor locally and insert the following settings:
memory_limit = 64M

upload_max_filesize = 64M

post_max_size = 64M

max_execution_time = 300
It is important that we use an “M” to define our filesize limit in megabytes, instead of the commonly used MB. You may also want to insert the max_execution_time variable and set it to something like 300. This will ensure that your website does not time out when uploading larger files.
Succeeding inserting the settings, save the file as php.ini and upload it to your server to the /wp-admin/ directory on your server. Now, the upload limit will be increased.
This method is reported to work in many users and it’s the quickest way I’ve found to solve this issue.
If you liked this article, then please subscribe here for more.